

The OmniPad Dial
The OmniPad Dial
A three-key macropad with a rotary encoder, built to be customized and documented end to end. This page covers what it is, what it's for, what's inside it, and how to get one.
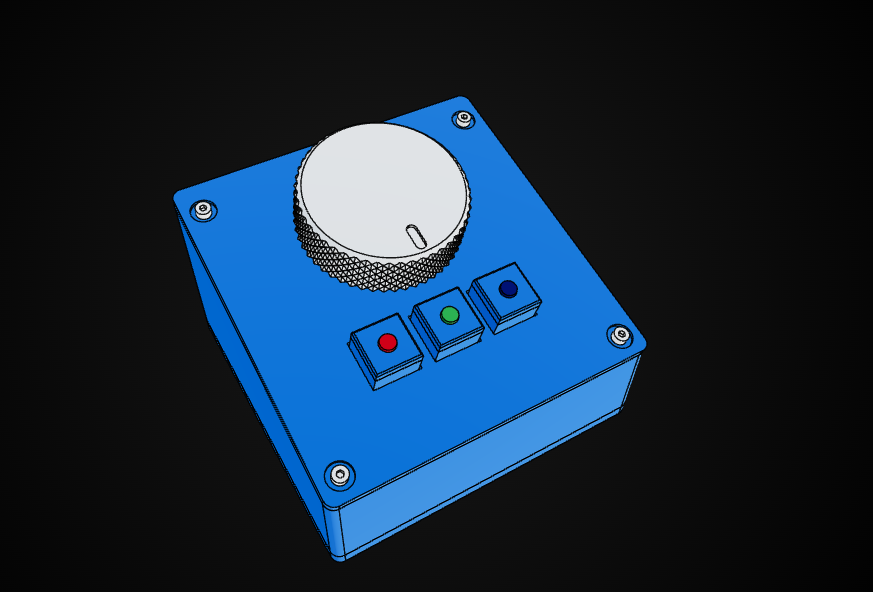
What it is
Three Cherry MX keys and one detented encoder with a push button. Open frame, sloped top panel, 50 mm knurled dial, silicone feet, USB-C.
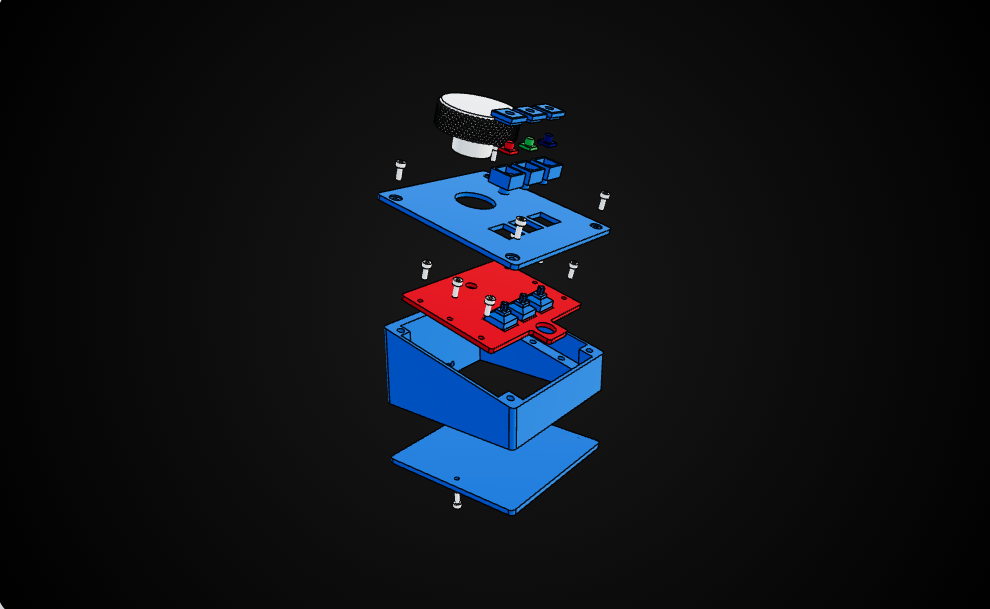
The enclosure is six printed parts — shell, inner ceiling, top face, bottom plate, knob and shaft — plus three keycap parts. It's the reference build for the platform: larger layouts, different form factors, and added hardware all start from this geometry.
What people use it for
The dial does most of the work. In video editing it scrubs the timeline while the keys set in and out points, cut, and ripple delete. In CAD and 3D modelling it orbits or zooms the view with tools like extrude, fillet and measure on the keys. In photo work it drives brush size or exposure. For streaming it handles scene switches, mute, and starting a recording.
Away from the desk the same three keys and a dial jog a machine axis, step a bench supply, advance a test sequence, or switch relays for lighting and extraction — with a deliberate two-key press where an action shouldn't happen by accident.
It also works as a simplified input: a few large keys that each do one job, so nobody has to navigate a menu to get to the thing they need.
It doesn't have to stop at a keyboard
There's room inside for more than the controller. An ESP32 adds Wi-Fi and Bluetooth, so the pad can talk to a network or another device instead of only the computer it's plugged into. Relay boards, sensor breakouts, displays and motor drivers all fit the same way — the enclosure gets designed around whatever the build needs to hold.
That's the point at which it stops being a macropad and starts being control hardware.
Components
Three parts on this list have look-alikes that don't work, so the reasons are attached.
Controller — WeAct Black Pill, STM32F401CEU6, V3.0. Board revision matters, because revisions move pins. This one is verified against the physical unit.
Keys — Cherry MX, plate mount, ×3. 14 mm square cutout.
Encoder — KY-040 module, ×1. The module carries its pull-up resistors on the board. A bare PEC11R needs two 10 kΩ pull-ups added, or it reads garbage.
Buzzer — PS1240-style, Ø12 mm, passive, ×1. A passive piezo makes sound only when fed a square wave; ours runs at 4 kHz. An active buzzer has its own oscillator and sounds on DC. They are the same-looking 12 mm disc and need opposite firmware. Buy the wrong one and the pad stays silent while every other test passes.
USB-C breakout, ×1. The recess is cut so the plug bottoms out on the connector rather than the shell.
Brass heat-set inserts — Ø4.5 mm OD, M3, 4–5 mm long, ×18. Plus two of a smaller Ø3.45 mm type for the USB breakout. Those two are not interchangeable: their centres sit 7.925 mm from the port cutout, leaving 1.05 mm of material.
Screws — M3 × 8 mm socket head, ×12.
Silicone feet — 14.6 mm, ×4.
Pin map
Keys 1–3 — A7, A6, A5
Encoder A / B — B5, B6
Encoder push — B7
Piezo — A4 → piezo → GND
Status LED — C13, onboard, active low
Every pin bench-tested on the physical unit. Keep off A11 and A12 (USB), A13 and A14 (SWD), C14 and C15 (crystal), B2 (BOOT1). A9 and A10 are left free as a serial bootloader rescue path.
Setting The Key Bindings
Plug the pad into a computer and open Vial. It shows up on its own — the layout lives on the pad, so there's no config file to track down.
Click a key, pick what it should do. The change writes to the pad straight away and stays there when you unplug it, so the mapping travels with the pad instead of living on one computer.
The dial appears as three separate controls — turn one way, turn the other, and press — each assigned independently.
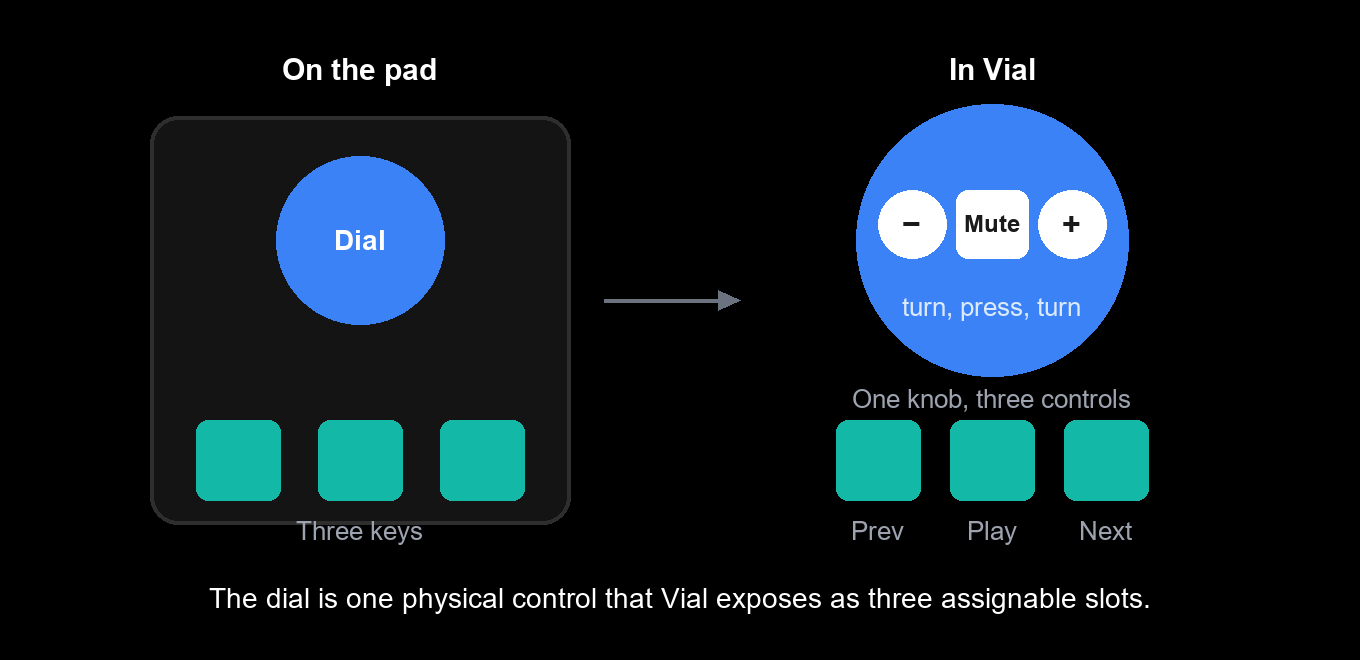
The pad also works as a keyboard on a phone or tablet over USB-C, though changing the assignments needs a computer.
Files and firmware
The print files are free — personal or commercial purpose, no difference.
That download is STL — nine parts, print settings, the full bill of materials, assembly and wiring. Everything you need to build the pad exactly as designed.
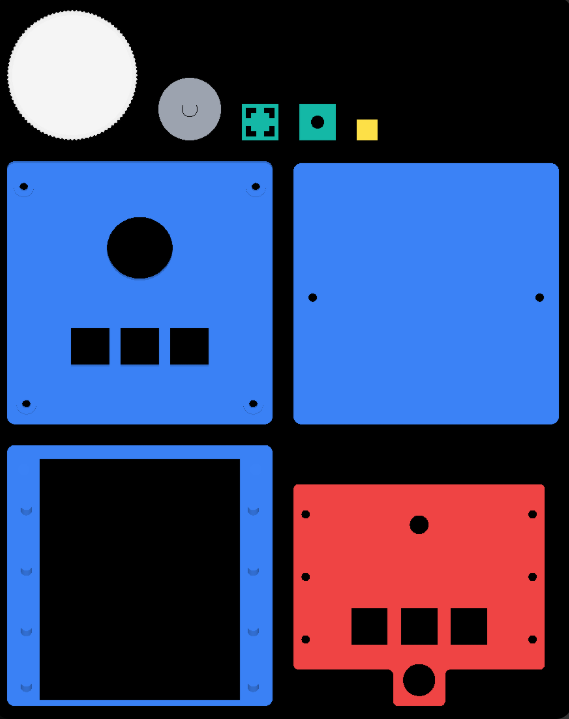
The editable CAD is paid. STL is a mesh: you can scale one, but you cannot reopen it and move a mounting hole, change a wall thickness, or take a real dimension off a face. The CAD source pack adds STEP files for the six enclosure parts plus the full assembly with every part in position — the file to open if you want to fit a different board, adapt the enclosure, or design something that bolts onto it. The three keycap parts stay STL only.
Remapping is free. Vial covers keystrokes, shortcuts, media keys, macros and layers, and you do it yourself.
We build the compiled firmware. That's what lives below the keymap: driving relays, reading sensors, debouncing limit switches, requiring two buttons held before an action starts, gating actions behind a tracked state, and feedback patterns that distinguish one condition from another by ear.
The dividing line is simple — if it affects the physical world or runs unplugged, it's firmware work.
Custom Builds
Tell us what the pad has to do: the equipment, the actions, and anything that must never happen by accident.
You get a layout, a preview link you can spin in your browser, and a price. Geometry is approved before anything is printed or compiled. Delivery includes the firmware, a documented pin map, and a part list with the reasons attached. Which design files come with it depends on the job, and it's agreed in the quote rather than assumed.